How to Make a Sourdough Starter From Scratch (Including the Days It Looks Dead)
Most people who quit sourdough quit on day 4. The starter bubbled up nicely on day 2, then went flat and sour and sat there looking completely dead for three days straight. So they tipped it down the sink and decided sourdough wasn’t for them.
That flat stretch is normal. It isn’t a failure, it’s just the part nobody photographs. A starter is flour and water left out until wild yeast moves in, and wild yeast takes its time. You don’t need a bakery, a proofing box, or a warm farmhouse kitchen. You need a jar, a scale, and about two weeks of low effort. This covers what happens each day, including the days it looks dead, and how to keep the thing alive once it’s going.
What do you need to make a sourdough starter?
Four things, and you might own all of them already.
Flour. Unbleached all-purpose or bread flour for the daily feeding. A store brand runs about $4 for a 5 lb bag (Great Value Enriched and Unbleached Bread Flour, Walmart, checked August 2026); King Arthur unbleached all-purpose is about $5.50 for a 5 lb bag (Walmart, checked August 2026). Bleached flour can work, but the bleaching slows things down, so unbleached is the safer pick. A small bag of whole wheat or rye helps too: it carries more wild yeast and minerals, and a spoonful in the first few feedings speeds things up.
Water. Tap water is fine. If yours is heavily chlorinated and you can smell it, leave it in an open jug overnight or run it through a carbon filter, since chlorine knocks back the same microbes you’re trying to grow. Many US utilities use chloramine, which won’t gas off, so filter that one.
A jar. A wide-mouth glass jar, quart size, so you can stir and scrape without wearing it. A 12-pack of Ball wide-mouth quart jars is $19.99 at Ace Hardware (checked August 2026), so under two dollars each, and you’ll use the spares. Don’t seal it tight. A loose lid, or the lid just resting on top, lets gas escape.
A digital kitchen scale. This is the one that matters. Sourdough is a ratio, and a cup of flour can vary by up to 20 percent depending on how you scoop it. A basic scale that reads grams is around $12 (Mainstays 6 lb digital kitchen scale, Walmart, checked August 2026). Weigh everything and the guesswork disappears.
There’s a one-page starter checklist in the free guide if you want it stuck to the fridge.

Should you just buy a starter instead?
You can. Dried starter from a bakery, or a cup from a friend, skips the slow first week and gets you baking sooner. It’s a fair shortcut. But you still have to learn to feed it and read it, which is most of the actual skill, and a starter you built yourself costs almost nothing and shows you what normal looks like at every stage. If you have a week of patience, make your own.
What happens to a sourdough starter each day?
Here’s the honest timeline. Yours might run a day or two faster or slower depending on how warm your kitchen is. Warm speeds it up, cool drags it out. Feed at roughly the same time each day.
Day 1. Mix 50 grams flour and 50 grams water in the jar, plus a spoonful of rye or whole wheat if you have it. Stir to a paste, scrape down the sides, rest the lid on top, and put it somewhere a little warm. Nothing will happen for a while. That’s fine.
Day 2. Often you’ll get a burst of bubbles, sometimes enough to double the jar. This looks like success. It isn’t yeast. It’s a short-lived bacterial bloom, and it will collapse. Don’t bake, don’t celebrate, just feed it: discard all but about 50 grams, then stir in 50 grams flour and 50 grams water.
Day 3. Silence. The jar looks flat and lifeless and might smell sharp, or like old cheese, or a gym bag. This is the starter resetting itself while the real yeast gets established. Discard down to 50 grams and feed again.
Days 3 to 5: the lull. This is where most people give up. Little or no rise, maybe a thin layer of liquid on top, a smell that’s sour and a bit unpleasant. Keep going. Same discard, same feed, once a day. You are not doing anything wrong. The starter is working even though the jar looks like it quit.
Days 5 to 6. Small bubbles come back, slowly at first. The starter might climb a little between feedings and then sink. The smell starts to turn, from sharp toward something more like yogurt or beer.
Day 7. Usually rising in a fairly predictable way now, doming up over a few hours after a feed, webbed with bubbles, smelling pleasantly sour. It may not double reliably yet. Day 7 is a checkpoint, not the finish line. Most starters need 10 to 14 days, and a cool kitchen can push that to 3 weeks, before they’re strong enough to raise a loaf on their own.
| Day | What you see | What to do |
|---|---|---|
| 1 | Nothing | Mix 50 g flour + 50 g water. Rest lid on top. |
| 2 | Big bubbles, maybe doubled (the false rise) | Discard to 50 g, feed 50 g + 50 g. Don’t bake. |
| 3 | Flat, sharp or funky smell | Discard to 50 g, feed. Keep warm. |
| 3 to 5 | The lull: little rise, sour smell, thin liquid | Same discard and feed, once a day. Don’t quit. |
| 5 to 6 | Small bubbles return, smell shifts to yogurt or beer | Feed once a day, same time. |
| 7 | Rising over a few hours, bubbly, pleasantly sour | Keep feeding. Start testing for readiness. |
| 10 to 14 | Doubles predictably after each feed | Ready to try a loaf, or move to fridge-holding. |
Here’s how mine went. It rose on day 2 and I thought I’d nailed it first try. Then it stalled. For days it sat there as a flat, gray, lumpy liquid puddle, nothing like the thick bubbly mix you’re picturing, and it smelled sharp. I kept feeding it on schedule anyway. It was starting to come back around day 6 when it grew mold, so the whole jar went in the bin. The mold isn’t the normal outcome. The flat gray stretch is, and it’s the part that makes people quit early.

Why is your sourdough starter slow? Temperature and the warm spot problem
Nearly always, a sluggish starter is just cold. Wild yeast is roughly twice as active at 78 °F as it is at 65 °F. So a starter sitting on a counter in a cool apartment isn’t broken, it’s running at half speed, and everything the timeline above describes simply takes longer.
The sweet spot is about 75 to 80 °F. Most kitchens sit around 65 to 70 °F. A cool rental can be 60 to 64 °F, which is starter-in-slow-motion territory. You don’t need a proofing box. You need one slightly warm, out-of-the-way spot, and a normal home has a few:
- Oven with the light on, door shut. The bulb alone often holds an oven around 75 to 85 °F. Check it with a thermometer first, because some run to 90 °F or hotter, which is too warm. Leave a note on the door so nobody preheats over your jar.
- Top of the fridge. The air off the back and top of a running fridge is usually a few degrees above room temperature and very steady.
- A high shelf or a cupboard above the stove. Heat rises, so the top of the room beats the counter.
- Next to something that runs warm. A router, a water heater closet, the warm side of the dishwasher after a cycle.
- A seedling heat mat with a thermostat. The kind sold for starting vegetable seedlings. Set the probe to about 77 °F and you have steady warmth for a few cents of power a day. This is the most dependable fix if your place is genuinely cold.
Warmer is not automatically better. Above about 85 to 90 °F the balance tips: the starter goes boozy and over-sour, the yeast struggles, and past roughly 120 °F you have cooked it. Warm and steady beats hot and swinging. If you’re doing all of this in a small rental, it’s one piece of what’s actually possible in an apartment without a yard.
How do you know a sourdough starter is ready?
Three signs and one timed test. You want all of them lining up for a few days running before you trust it with a loaf.
The look. A ready starter roughly doubles after a feed, domes or peaks on top, and is webbed with bubbles all the way through, not just a few on the surface. Hold the jar up to the light and you should see the structure through the glass.
The smell. Tangy, yeasty, a little like beer or plain yogurt. Sharp and clean. Not nail polish, not rot.
The float test. Drop a spoonful of fed starter into a glass of water. If it floats, it’s full of gas and probably ready. It isn’t a perfect test, a stiff starter can sink while still active, but a starter that floats within a few hours of feeding is a good sign.
The timed test. This is the reliable one, and it comes straight from the other end of the process, diagnosing a heavy loaf. Right after feeding, mark the starter level on the jar with a rubber band or a strip of tape. A ready starter is doubled and full of bubbles within 4 to 8 hours at 70 to 75 °F (21 to 24 °C). If it’s still flat after 8 hours in a cold kitchen, it’s not ready. Give it more time and more warmth.
An under-ripe, slack starter is the single most common reason a loaf bakes up tight and gummy, so it’s worth waiting for. There’s more on that in why your sourdough turns out dense.
How do you feed a sourdough starter? Ratios, timing, and scaling up
A feed is three things in equal weight: starter, flour, water. Keep 50 grams of starter, add 50 grams flour and 50 grams water. That’s a 1:1:1 feed and it’s all you need day to day.
The ratio is your speed control. More flour per part starter means a longer, slower climb to peak.
| Ratio (starter:flour:water) | Example | Roughly peaks in | Use when |
|---|---|---|---|
| 1:1:1 | 50 g : 50 g : 50 g | 4 to 6 hours at 75 °F | Building up to a bake, warm kitchen |
| 1:2:2 | 40 g : 80 g : 80 g | 6 to 10 hours | Once-a-day feeding, average kitchen |
| 1:5:5 | 20 g : 100 g : 100 g | 10 to 14 hours | Cool kitchen, or stretching time between feeds |
Timing. Feed when the starter has peaked and is just starting to sink, or pick a set time each day and stick to it once it’s established. A starter kept at room temperature wants feeding once a day. A starter in the fridge wants feeding once a week, which is the next section.
Scaling up for a loaf. Don’t bake your main jar. The night before, build a separate levain from a spoonful of it: 20 grams starter, 100 grams flour, 100 grams water. Leave it out overnight, and by morning it should be risen, bubbly, and floating, ready for a recipe. Your original jar carries on getting fed as normal, so you never run out.
What about the discard?
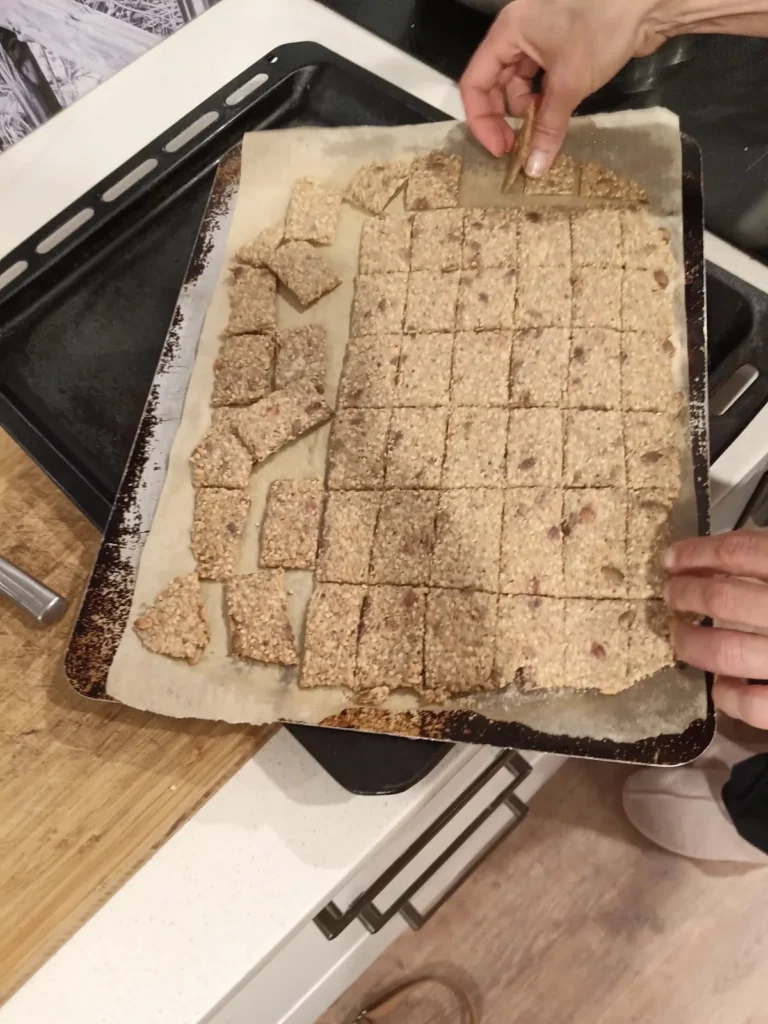
Discard is the starter you pour off before each feed, so the jar doesn’t overflow and the acidity doesn’t build up too far. In the first week, just throw it away. It isn’t active enough to be worth keeping. Once your starter is established, save discard in a covered jar in the fridge, where it keeps for several weeks, and stir it into pancakes, waffles, crackers, or a quick flatbread. It won’t make anything rise. It’s there for flavor and to waste less flour. Sourdough discard is really just one more ferment in a jar on your counter, alongside a batch of sauerkraut or kimchi. If it’s piling up faster than you can use it, here’s what to do with sourdough discard.
How do you store a sourdough starter between bakes?
If you bake once a week or less, the fridge is where the starter lives. Cold slows it right down, so once-a-week feeding is enough.
The weekly routine. Take the jar out, discard down to about 2 tablespoons, feed it 1:5:5 (say 20 grams starter, 100 grams flour, 100 grams water), leave it on the counter for an hour or two until it’s clearly active, then lid it and put it back in the fridge. That’s the whole maintenance schedule.
If you miss a week or three. The starter builds up a layer of dark liquid on top and smells sharp and boozy. That’s hooch, and it means the starter is hungry, not dead. Pour the liquid off, discard down to a spoonful, feed it, and leave it somewhere warm.
Reviving after a month or more. Discard most of the jar, feed what’s left, keep it warm, and repeat twice a day. It usually takes 2 or 3 days of this to come back to full strength. If there’s a dried crust on top, scrape down to the soft starter underneath and feed that. A neglected starter is remarkably hard to actually kill.
The exceptions are fuzzy mold and pink or orange streaks. Those don’t get revived, they get thrown out, which is the next section.
What is wrong with your sourdough starter?
Almost everything a starter does wrong is fixable with warmth and more frequent feeding. Two things are not fixable, and this section is clear about which is which.
Why is your sourdough starter not rising?
Usually cold. Move it somewhere warmer, swap part of each feed to whole wheat or rye, and make sure you’re actually discarding before you feed rather than just topping up the jar. Give it another 5 to 7 days. A slow starter is nearly always a patience problem, not a dead one.
Why did your starter rise on day 2 and then stop?
That’s the false rise running its course. Completely normal. Keep feeding once a day and the real yeast will show up by the end of the first week or shortly after.
What is the hooch on top of your starter?
The starter is hungry. That liquid is alcohol from yeast that has run out of food. Pour it off for a milder starter, or stir it back in for a tangier one, then feed more often or use more flour per feed (1:2:2 or 1:5:5).
Why does your starter smell like acetone or nail polish remover?
Same cause as hooch, further along. The starter is very hungry and has gone too acidic. Feed it twice a day for 3 or 4 days and move the ratio to 1:5:5. It comes back.
Is that mold on your sourdough starter?
White, green, black, or pink fuzz standing up off the surface is mold. Throw the whole starter out, jar and all, or run the jar through a hot dishwasher before you reuse it. Don’t scrape the fuzz off and keep going. It’s flour and water. Starting over costs you a week and a few cents.

What do pink or orange streaks on a starter mean?
This is bacterial, and it means the starter sat too warm or went too long without feeding. Same call as mold: pour it out and start fresh. Don’t taste it to check.
When should you throw a sourdough starter out?
Fuzzy mold or pink to orange coloring means throw it out and start over, no exceptions. A sharp smell, hooch, a gray liquid layer, or a slow rise are all normal and all fixable. When you’re not sure, and it has only ever been flour and water, remake it. That’s the honest answer, and it costs almost nothing.
Will a sourdough starter smell or attract fruit flies?
Not if you keep it covered. A healthy starter smells pleasantly sour, like yogurt or beer, not acrid. Fruit flies only come if the jar sits open or the rim stays dirty, so rest the lid on between feeds, wipe the rim, and keep discard covered in the fridge.
One small step tonight: mix 50 grams of flour and 50 grams of water in a jar, rest the lid on top, put it somewhere a little warm, and set a daily phone reminder. Then leave it alone for 2 days. That’s the whole commitment for the first stretch.
Once your starter passes the timed test 3 feeds running, it’s bake-ready, and you can raise a loaf without special equipment. Here’s how to bake sourdough without a Dutch oven.
If you reach the point where you want repeat bakes on a schedule, a loaf at a time, worked out around a normal week, that’s what The Micro-Bakery Handbook (US$16.97) is for. It picks up where this article stops.
And if you know someone with a jar of gray sludge they’re about to pour down the sink, send them the troubleshooting section before they do.