How to Grow Sprouts at Home: A Jar, a Rinse, and Three Days
Sprouts are the simplest thing on this site to start growing: a jar, a seed, and water you were going to use anyway. They’re also the one crop here with a genuine, documented food-safety risk attached to eating them raw, and that risk gets left out of most guides that cover the fun part and skip the rest. This page covers both, honestly. If you’re just starting out, this is one of the easiest wins in urban homesteading for beginners, and it works the same whether you’re homesteading in an apartment or homesteading for renters with no outdoor space at all.
What Sprouts Are (and What You Need to Grow Them)
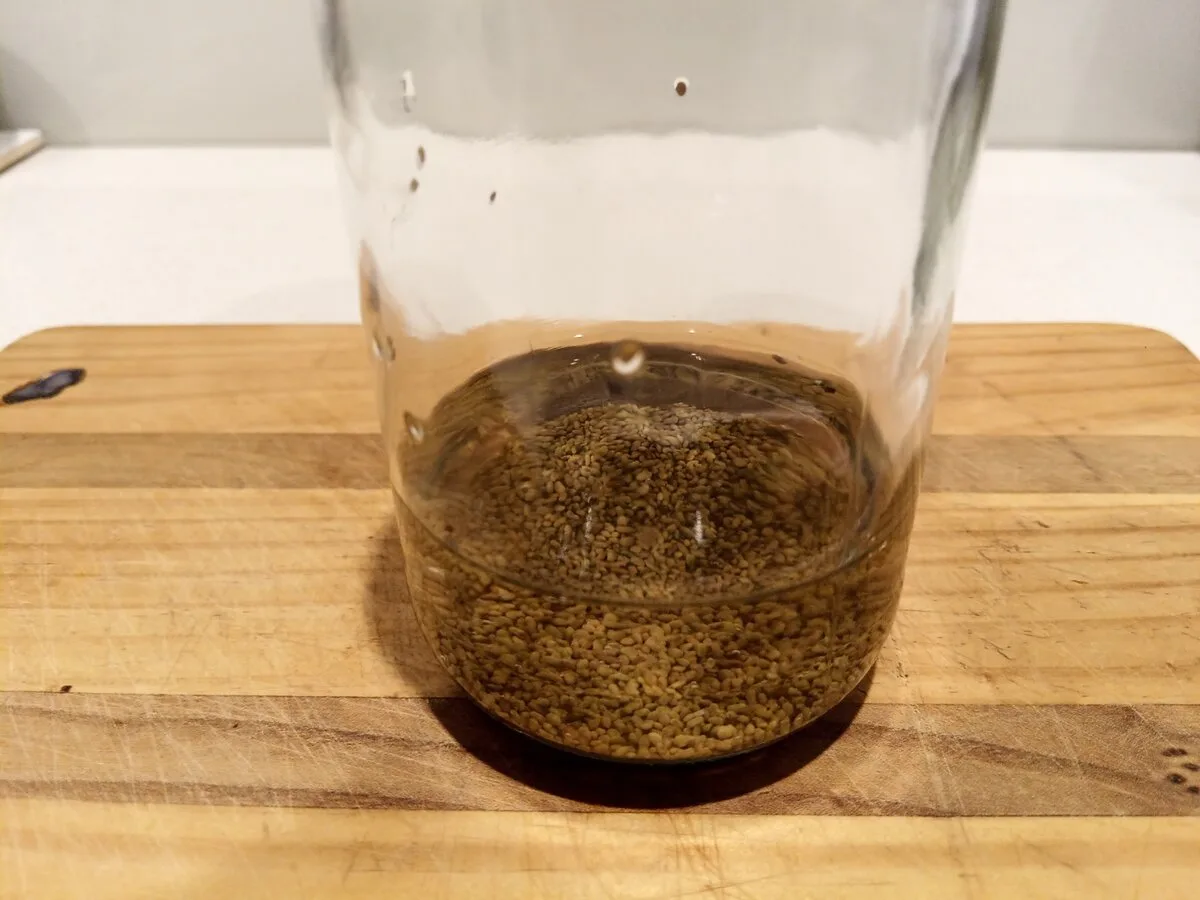
A sprout is a seed a few days into germinating, eaten whole (seed, root and first shoot) rather than grown on into a plant. It’s living on the energy already packed into the seed, not on light or soil, which is why the whole process happens in a jar on a bench with no window needed at all — the same reason the other crop that likes the dark works indoors. If a window is exactly what you don’t have, see what else grows without a sunny window.
What you need: seed sold specifically for sprouting (more on why that matters in the next section but one), a wide-mouth jar, a piece of mesh, muslin or a purpose-made sprouting lid to drain water without losing the seeds, and access to a tap. That’s the entire equipment list. Nothing here needs a purchase beyond the seed itself if you already own a jar.
Sprouts vs. Microgreens: Which One Do You Want?
They get confused constantly, and the mix-up matters because the safety profile is genuinely different, not just the method.
| Sprouts | Microgreens | |
|---|---|---|
| Grown in | Water, in a jar or tray, no medium | Potting mix or a growing medium, under light |
| What you eat | The whole thing: seed, root, shoot | The stem and leaves, cut above the medium; roots left behind |
| Time to eat | 3 to 7 days, depending on the seed | 7 to 14 days |
| Light needed | None | Bright indirect light or a grow light |
| Equipment | A jar | A shallow tray |
| Raw safety | A documented salmonella/E. coli risk (see below) | No comparable raw-eating risk |
| Cost per batch | A few cents of seed | A few dollars of seed and medium |
If you want the fastest, lowest-equipment food you can grow indoors and you’re comfortable with the safety practices below, sprouts win. If you’d rather avoid the raw-eating risk entirely, or you want something to cut with scissors and put on a sandwich, how to grow microgreens at home is the better starting point.
Which Seeds to Sprout, and Where to Buy Them
Mung bean, lentil, alfalfa, broccoli and chickpea are the common starting seeds, and they behave differently enough that “sprouts” isn’t really one timeline (see the day-by-day section below).
Buy seed sold specifically for sprouting, not garden seed packets. This is a safety point, not a preference: seed intended for planting in soil isn’t held to the same handling standard as seed sold for sprouting and eating raw, and treated garden seed can carry fungicide coatings that have no business in a jar you’re about to eat from.
Sprouting Safety: The Part Most Guides Skip
Sprouts carry a real, documented risk of Salmonella, E. coli and Listeria contamination that microgreens don’t share, and it isn’t a fringe concern. Per the FDA’s own current guidance (fda.gov/food/buy-store-serve-safe-food/selecting-and-serving-produce-safely, last updated 05 March 2024): “Unlike other fresh produce, sprouts are grown from seeds and beans under warm and humid conditions. These conditions are also ideal for the growth of bacteria, including Salmonella, Listeria, and E. coli.” The same warm, damp, enclosed setup that makes sprouting fast and easy is also exactly what those bacteria want, and contamination usually starts on the seed itself rather than in your kitchen.
The FDA’s own recommendation: “People who are more vulnerable to foodborne illness…should avoid eating raw or lightly cooked sprouts of any kind.” That means children, older adults, pregnant women, and anyone immunocompromised should not eat sprouts raw at all. The mitigation for those groups isn’t a stricter rinse routine, it’s cooking the sprouts thoroughly before eating, which kills the bacteria a rinse alone won’t remove.
This isn’t a reason to avoid growing sprouts. It’s a reason to take the handling seriously: use sprouting-specific seed (above), keep everything genuinely clean rather than just rinsed, and know who at your table shouldn’t be eating them raw. Done properly, the risk is real but manageable, which is a more honest answer than either ignoring it or refusing to grow sprouts at all.
How to Grow Sprouts in a Jar, Step by Step
- Rinse 2 to 3 tablespoons of seed, then soak in plenty of clean water for 8 to 12 hours (overnight is easiest).
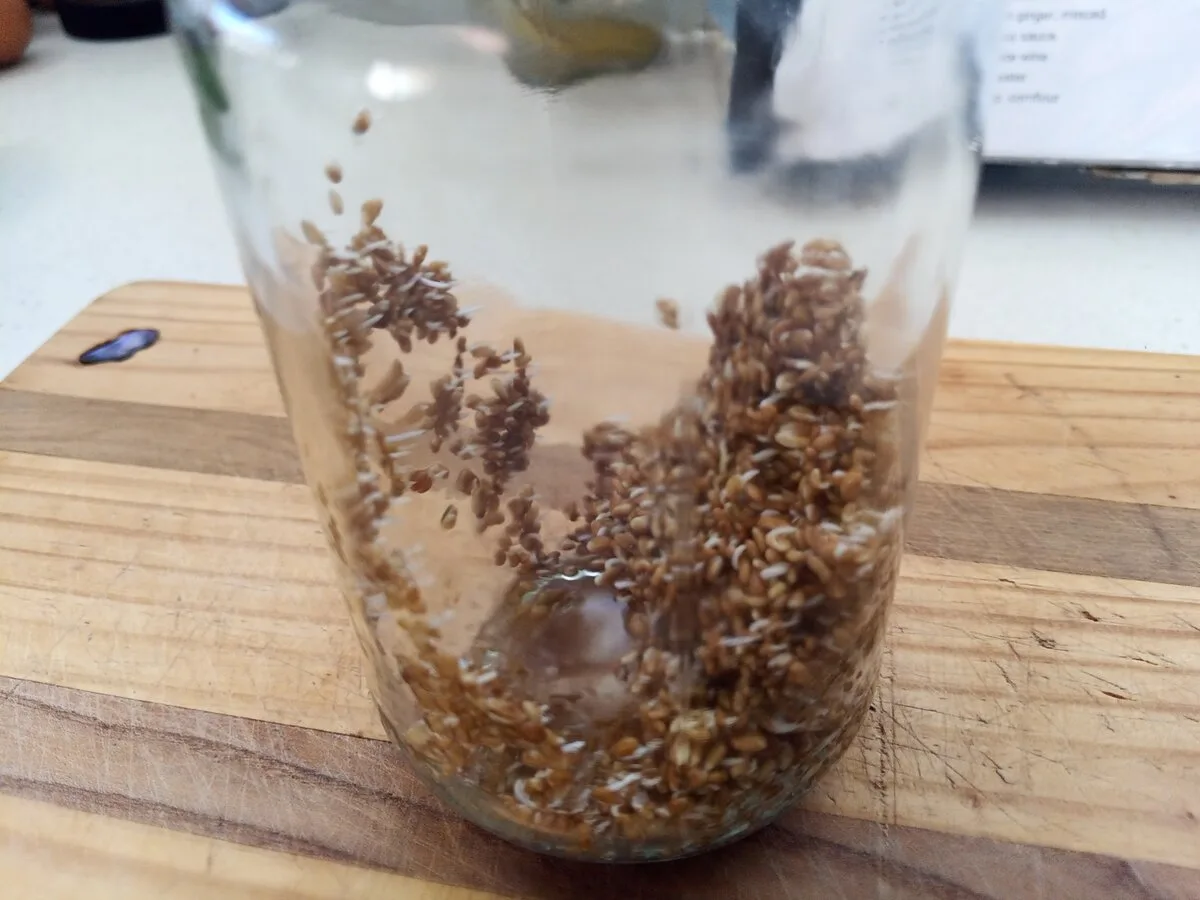
- Drain thoroughly through your mesh lid. Don’t leave standing water in the jar; sitting in water is what invites the bacteria the FDA’s guidance warns about, not just what slows germination.
- Lay the jar on its side, slightly tilted downward, somewhere at room temperature out of direct sun, so any remaining water keeps draining and air can reach the seeds.
- Rinse and drain again, thoroughly, twice a day, every day, until harvest. This is the one step you can’t skip a day on.
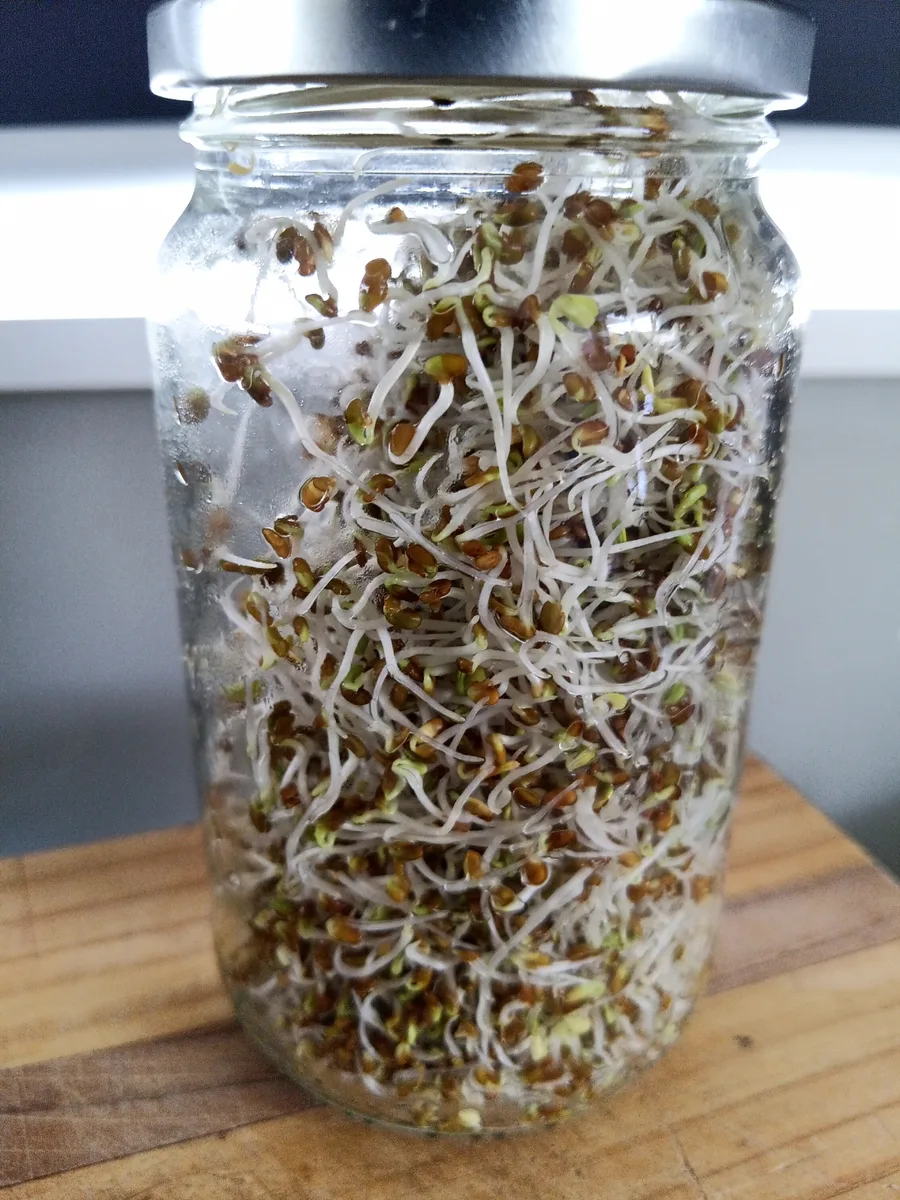
- Harvest when the seed has a visible tail and, depending on the seed, a small first leaf. See the day-by-day guide below for what to expect from your specific seed.
Want the next steps mapped out once your first jar works? Grab the free beginner’s guide — a no-fluff starting point for growing food without land.
How to Grow Sprouts in a Tray (and When It’s Better)
A tray (a mesh-bottomed sprouting tray, or a shallow tray you drain by tilting) suits a larger batch than one jar comfortably holds, and it gives better airflow across a wide, shallow layer of seed, which some growers find reduces the risk of a damp, matted center where mold can start. The trade-off is more surface area to keep clean and more space taken up on a bench.
Use a jar for a single-person batch or your first attempt. Move to a tray once you’re sprouting regularly, want a bigger harvest at once, or you’re finding a jar traps too much moisture for a particular seed.
The Rinse Routine: Twice a Day, Every Day
This is the discipline the whole method depends on, and it’s also where people quietly stop bothering and get a worse result for it. Rinse means: run clean water through the seeds, swirl gently, then drain completely, not just tip and leave damp. Twice a day, roughly 12 hours apart, without skipping a day. Miss a rinse and you’re not just slowing growth, you’re extending exactly the warm, wet, stagnant window that favors bacteria over sprouts.
Day by Day: What You Should See
Timing varies by seed, and treating “sprouts” as one universal timeline is where a lot of guides go wrong:
- Mung bean, lentil: visible tail within 24 to 48 hours, ready to eat around day 3 to 5.
- Alfalfa, clover: slower to start, typically ready around day 5 to 7, with fine root hairs that can look like mold to a first-timer (see the next section for the actual difference).
- Broccoli, radish: similar pace to alfalfa, ready around day 4 to 6, with a noticeably peppery smell developing as they mature.
Across the whole family, that’s a real range of 3 to 7 days depending on the seed, not a single fixed number.
How to Store Sprouts, and How Long They Keep
Refrigerate sprouts as soon as they’re harvested, in a container that lets some air through rather than sealed completely airtight, and eat them within about 3 to 5 days. They don’t improve with time the way a ferment does; treat them as a fresh food with a short window, not a pantry item.
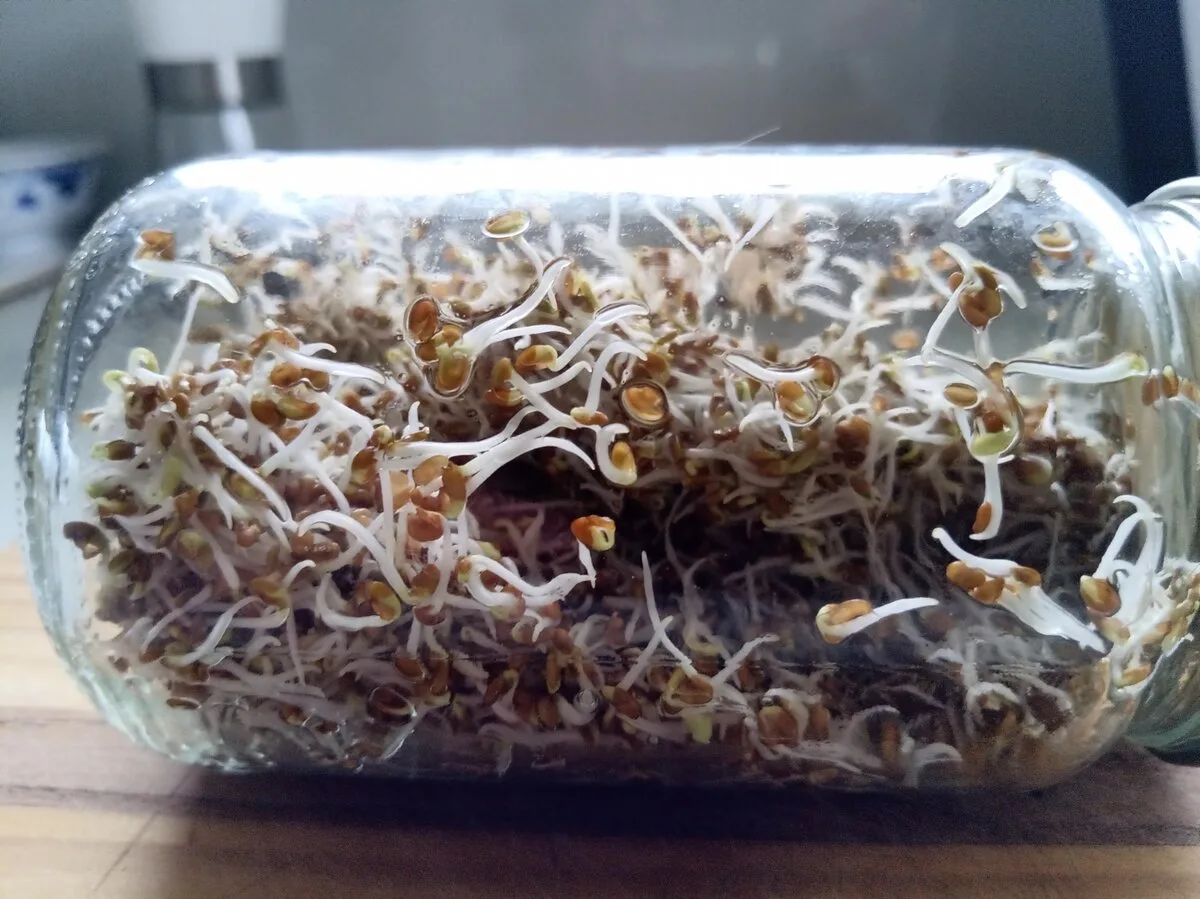
That’s the difference a day makes: one more day past this and the tails have kept stretching and more of the green tips have opened up.
What Went Wrong: Smell, Slime, Mold and No Growth
A faint, fresh, slightly vegetal smell is normal. A sour, ammonia-like or outright rotten smell means bin it, don’t taste-test it to check.
Slimy seeds, especially if the slime is between seeds rather than just a wet surface, is a sign of standing water and poor drainage, not a normal part of sprouting. Improve drainage and rinse frequency; if it’s already slimy, the batch is done, start again rather than trying to rinse it back.
True mold looks fuzzy and is usually white, gray, green or black; it’s distinct from the fine white root hairs alfalfa and clover seeds naturally grow, which can look alarming to a first-timer but aren’t mold at all. If you genuinely can’t tell the difference, treat it as mold and discard the batch. When in doubt, bin it.
No visible growth after 48 hours usually means old or non-viable seed (sprouting seed does have a shelf life) or a jar sitting somewhere too cold. Check your seed’s date and move it somewhere closer to room temperature before troubleshooting further.
Are Sprouts Worth Growing?
Honestly: yes, but with real limits worth knowing before you start. A package of sprouting seed (mung bean runs about $3.59 at True Leaf Market, checked 2026-09-14) covers many batches at 2 to 3 tablespoons each, which makes sprouts one of the cheapest foods on this whole site to grow. The yield per jar is small, though, closer to a garnish or a sandwich topping than a meal on its own, and the twice-daily rinse is unforgiving: miss a day and you’re not looking at a slightly worse batch, you’re looking at a bin job. There’s also no season to work around: sprouts grow the same way on a bench in January or July, unlike almost everything else on this site. If you want a low-effort, forgiving grow, microgreens or herbs are a better fit. If you want the fastest possible homegrown food and don’t mind the daily discipline, sprouts deliver on that promise better than almost anything else in an apartment.
If your first jar worked, the next logical step is a 30-day routine, not another one-off project. The No-Land Homesteader’s Starter Kit (US$12.97) is built around exactly that: a month of small, repeatable growing wins for someone who just proved sprouts work in a jar on their counter.
FAQ
How long do sprouts take to grow?
3 to 7 days, depending on the seed. Mung bean and lentil are the fastest, usually ready by day 3 to 5; alfalfa, clover, broccoli and radish typically take 5 to 7.
Are sprouts safe to eat raw?
For most healthy adults, yes, if you use sprouting-specific seed and keep the rinse routine genuinely clean. The FDA specifically advises children, older adults, pregnant women and anyone immunocompromised to avoid raw sprouts of any kind and to cook them thoroughly instead.
Do sprouts need soil?
No. That’s the whole appeal: a jar, water and a rinse routine is the entire system, no growing medium involved at all.
Can I sprout regular seed packets meant for the garden?
Don’t. Seed packets sold for planting aren’t held to the same handling standard as seed sold for sprouting and eating, and some garden seed carries fungicide coatings that have no place in something you’re about to eat raw.
Do you need to cut sprouts to harvest them?
No. There’s no cutting technique the way there is with microgreens — a sprout is eaten whole, so harvesting is really just a final rinse and drain once it’s reached the length you want, then straight into the fridge.
How do you harvest sprouts?
There’s no separate harvesting step: once the seed has a visible tail (and, for some seeds, a small first leaf), give it one final thorough rinse and drain, then move it straight to the fridge.